 |
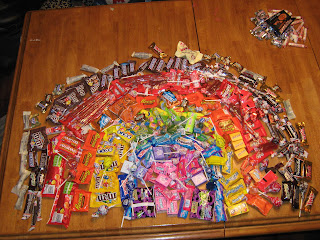
| We play with our food around here. Yes. Candy is food. |

Sunday, October 31, 2010
Friday, October 29, 2010
Finish for Friday
This week I have been playing around making myself some bags. These are not for my big order. I am just trying to teach myself new ways to construct things.
I hate to use patterns. My mind just does not work like other people's minds, I guess, so I have to work things out in my own head and make them that way.
This purse/bag took me about 5 or 6 hours. I would have been faster, but I started with no concrete idea and kept changing my mind about how I wanted it to look. I definitely learned a lot and the next one I make like this will be much nicer. However, I am happy enough with this one that I will carry it.
 |
| I think I might add a vintage jeweled pin or a scrappy gold fabric flower to the yoke. |
 |
| Used a magnetic clasp and lined it using the same fabrics from the outside of the bag, but reversed their positions |
 |
| Shirred the sides and bottom |
The gray fabric is a $2/yd one from Walmart and the flowered velvet is a skirt from Goodwill. Stupid skinny size 4 people. Their clothes just do NOT have enough fabric.

My other sewing finish this week is something for my friend's grandfather. The arms of his couch are worn through, although the rest of it is in pretty good shape. We found a couple coordinating fabrics and made reversible arm covers for him. Well, actually my friend found the fabric and I made the covers. I told her she could tell him that she made them and take the credit but she said she doesn't want anyone thinking she can do stuff like that. I can definitely see her point.


I am pretty happy with how they turned out and they really weren't hard at all.
Now, don't go telling anyone that I know how to make these. I'll deny it!
I am linking up to Lit and Laundry's Finish For Friday. Check it out!
I am linking up to Lit and Laundry's Finish For Friday. Check it out!
Thursday, October 28, 2010
Yes, Virginia, you CAN spray paint your clothes.
The boys wanted to be Mario and Luigi for a Halloween party last weekend.
(Actually, I think they would like to be Mario and Luigi most of the time.)
Well, boys, ask and ye shall receive.
These were super-easy and cheap. I hit a few thrift stores and found some overalls which were very faded and run down. I simply laid them in the driveway and spray-painted them bright blue. The hats I was pretty lucky with. The red one was from Goodwill and I just had to spray the brim red, and the other one was originally blue and I spray-painted the whole thing green. It didn't cover very well so I used the leftover felt from the letters and glued it on the hat. The white circles are quilt batting and the letters are cut from felt and I just glued them all on. No sewing here- just lots of spray paint and glue.

 |
| It looks like I missed a spot here, but I think he just had the straps flipped around. |

Don't they look awesome? Of course they do.
And they weren't excited at all as you can see.
I had to dress up for the party, too, so of course I was a KITTEH! This is because I was able to make my entire costume in about 4 minutes. So the funny part...:
I inadvertently used a regular black marker instead of the erasable one. We all had mustaches or whiskers for a couple days. Paul laughed and laughed and laughed. And then every once in a while he meowed at me.
 |
| These are my crappy old safety glasses because OUR 6 MONTH OLD (MUTT) PUPPY ATE MY GLASSES. Like, literally ate the glass. There were a few tiny bits of shattered glass left along with a very mangled frame. You'd think that would make her sick, but, no, she was fine. Must be the lab in her. |
The boys had to dress up today for another event and they both insisted they would NOT have mustaches.
I promised if we used eyeliner it would come off, but they don't trust me anymore.
Friday, October 22, 2010
One tote down, six to go
In case you missed my last post, I am making 7 bags for an order for a friend. Today I finished the first one.
(I want to keep it.)


I wish the green would show up more true. It's a very limey green, but on here it looks almost minty. I need a better camera or something. Or better lighting in a better house. Or something.
I wanted a really stiff bag that would be easy to fill so I used a heavyweight interfacing (Peltex? I think it was called?) and quilted it about a half an inch apart before I cut out the front and back. I did the quilting after I did the applique. It helped, but I only used a lightweight fusible interfacing for the lining and next time I think I will use the heavier weight for both. I would like the bag to stand up on it's own, which is asking a lot of a bag this size. Speaking of, it is:
27" across on the top.
19" across on the bottom
8" deep
17" high
The straps are about 3 ft long
Those measurements have no rhyme or reason, beside the fact that I cut it out to use the entire piece of brown upholstery fabric that I had. This was as big as I could get it- trust me, there were barely some shreds of waste.


I only put 3 pockets inside- one for pens (or scissors), one that would be good for holding a cell phone and one that is pretty large. It holds a magazine with room to spare.

This was my first attempt at a loop/button closure. Notice the marking pen on the bag. Sign of a true seamstress, that. Or, no wait, that's sewing through your finger, isn't it? Never mind. I'm just a hack.
Next post: Mario and Luigi costumes. No sewing. Did you know you can spray paint clothes?
I am linking up to two parties this week. I actually made myself finish this today so I could get in on the fun. These parties are good for me.
Lit and Laundry hosts Finish For Friday, which does not have to be a sewing related finish, and Amylouwho hosts a Sew and Tell every Friday. Both are super fun to cruise around. Now, go! Enjoy!
Monday, October 18, 2010
In the works

Please excuse the crazy glare. When I started blogging I thought my photography skills might improve as my quilting skills did, but it turns out you have to actually work at things in order to get better at them.
This is for a set of bags I am making for a friend. I have an order!! I am sort of easing my way into making this sewing thing a possible money-making gig. My friend owns a business and wants to give her employees each a custom bag for a Christmas gift. (Awesome boss, right?) I took her business card design and tweaked it up quite a bit and came up with this, which is something I think I can applique with a modest degree of success. Now I just have to incorporate it into a bag design. Oh, yeah, and make 7 lined reversible bags... with pockets... and maybe zippers? Nothing like jumping in with both feet!
Friday, October 8, 2010
Cherry Checkerboard Quilt and I learned a new trick!
 |
| Cherry Checkerboard |
 |
| Cherry Checkerboard with Super Helper |
I started this quilt a LONG time ago with the leftovers from this quilt. It sat around as a quilt top for, oh, forever. I have a hard time quilting anything larger than a baby quilt on my Bernina. Some people can ram a king size bedspread through there, but I am not one of them, being as I am not double jointed and have only the standard two arms.
Last year my local quilt store got a long arm quilter and made it available for renting. For $15/hr you can happily quilt tents or king size bedspreads or even normal size quilts. I took a class for 2 hours and the next day I quilted TWO quilts in about 7 hours. It was actually really fun. I dislike the quilting step on my domestic machine and expected not to like it on the long-arm. WRONG! I loved it. I will definitely be doing this regularly from now on. They even change the bobbin for you- and supply the thread. It's a great deal.


I did loopdy-loops on this quilt and am very happy with how it turned out. Next time I might get brave and do some flowers or feathers or something fancy.
We are keeping this quilt and are already using it on the couch.
(But we do fold it up and put it away when we're done. At least while it still has that new car smell.)
I am linking up with Lit and Laundry for Finish For Friday. Swing on over and see what other bloggy persons have been up to.
ETA- I just found a really cool new to me blog, amylouwho, with a Sew and Tell for Fridays. There are some really really cool quilts and sewing projects over HERE.
ETA- I just found a really cool new to me blog, amylouwho, with a Sew and Tell for Fridays. There are some really really cool quilts and sewing projects over HERE.
Tuesday, October 5, 2010
Before/After Project- Desk
 |
| Before |
 |
| After |
The before picture is really a middle picture. I got this desk for $2.50 at Goodwill. It was a tan color before, full of stickers and just a mess. I forgot to take a picture of it. (Oops!) So, anyway, I painted it one time, didn't like it at ALL, and this week I painted it again.
My sister gave me a gallon of paint she had mixed up from a bunch of leftovers. It's a great denim colored blue, so I am using it a lot. Denim blue has become a neutral color to me. Everything matches jeans, right? The only problem is that I really really like this color and it is a OOAK gallon of paint.
I painted the whole desk black and then put a couple coats of blue over that. To get the distressed look, I grabbed some sandpaper and gave it a quick once over. I didn't go too crazy with it. A little goes a long way.
 |
 | |||||
Then I put four light coats of poylurethane on it so it should be a good and sturdy finish. The boys are using this desk so any extra "distressing" (mauling) that they do will just add to the look. I think. Probably permanent marker would not do much for it... but we know MY kids would never write on the walls or furniture...


Monday, October 4, 2010
Before/After Project- Dining Room Chairs
I have been on a mission lately- Our furniture is in pretty poor shape. It's not old, but in our house furniture ages in dog years. So it all needed a makeover. Here are the dining room chairs. We do have six, so two more will be coming, but at this point those two are functioning as sawhorses for the living room baseboard trim which I am painting. (BTW- painting all the trim in the entire house is a job for crazy people. It's never-ending.) | |
| Before |
Saturday, October 2, 2010
How to make felted chair pads- you know, the kind you put on the bottom of the legs of your chairs so they don't scratch your floor?
1. Get cat(s).
(The number of cats you have will directly affect the amount of time needed for proper felting.)
2. Don't clean the bottoms of your chair legs. Ever. You can clean the top of the chair, but don't flip them over and clean the bottoms.
3. Voila! Felted chair pads.
Subscribe to:
Posts (Atom)
